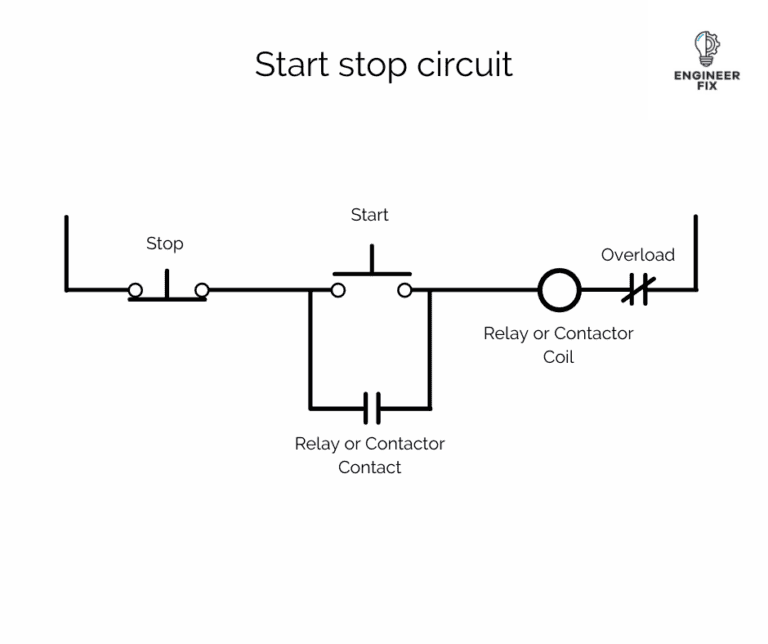
Start Stop Circuit Drawing
Control wiring Stop start station wiring diagrams The essential guide to start-stop diagram
Start Stop Circuit Diagram
Circuit stop start circuitlab description Start stop circuit drawing Relay latch make using latching stop start act contact circuit additional without
Auto start stop circuit diagram
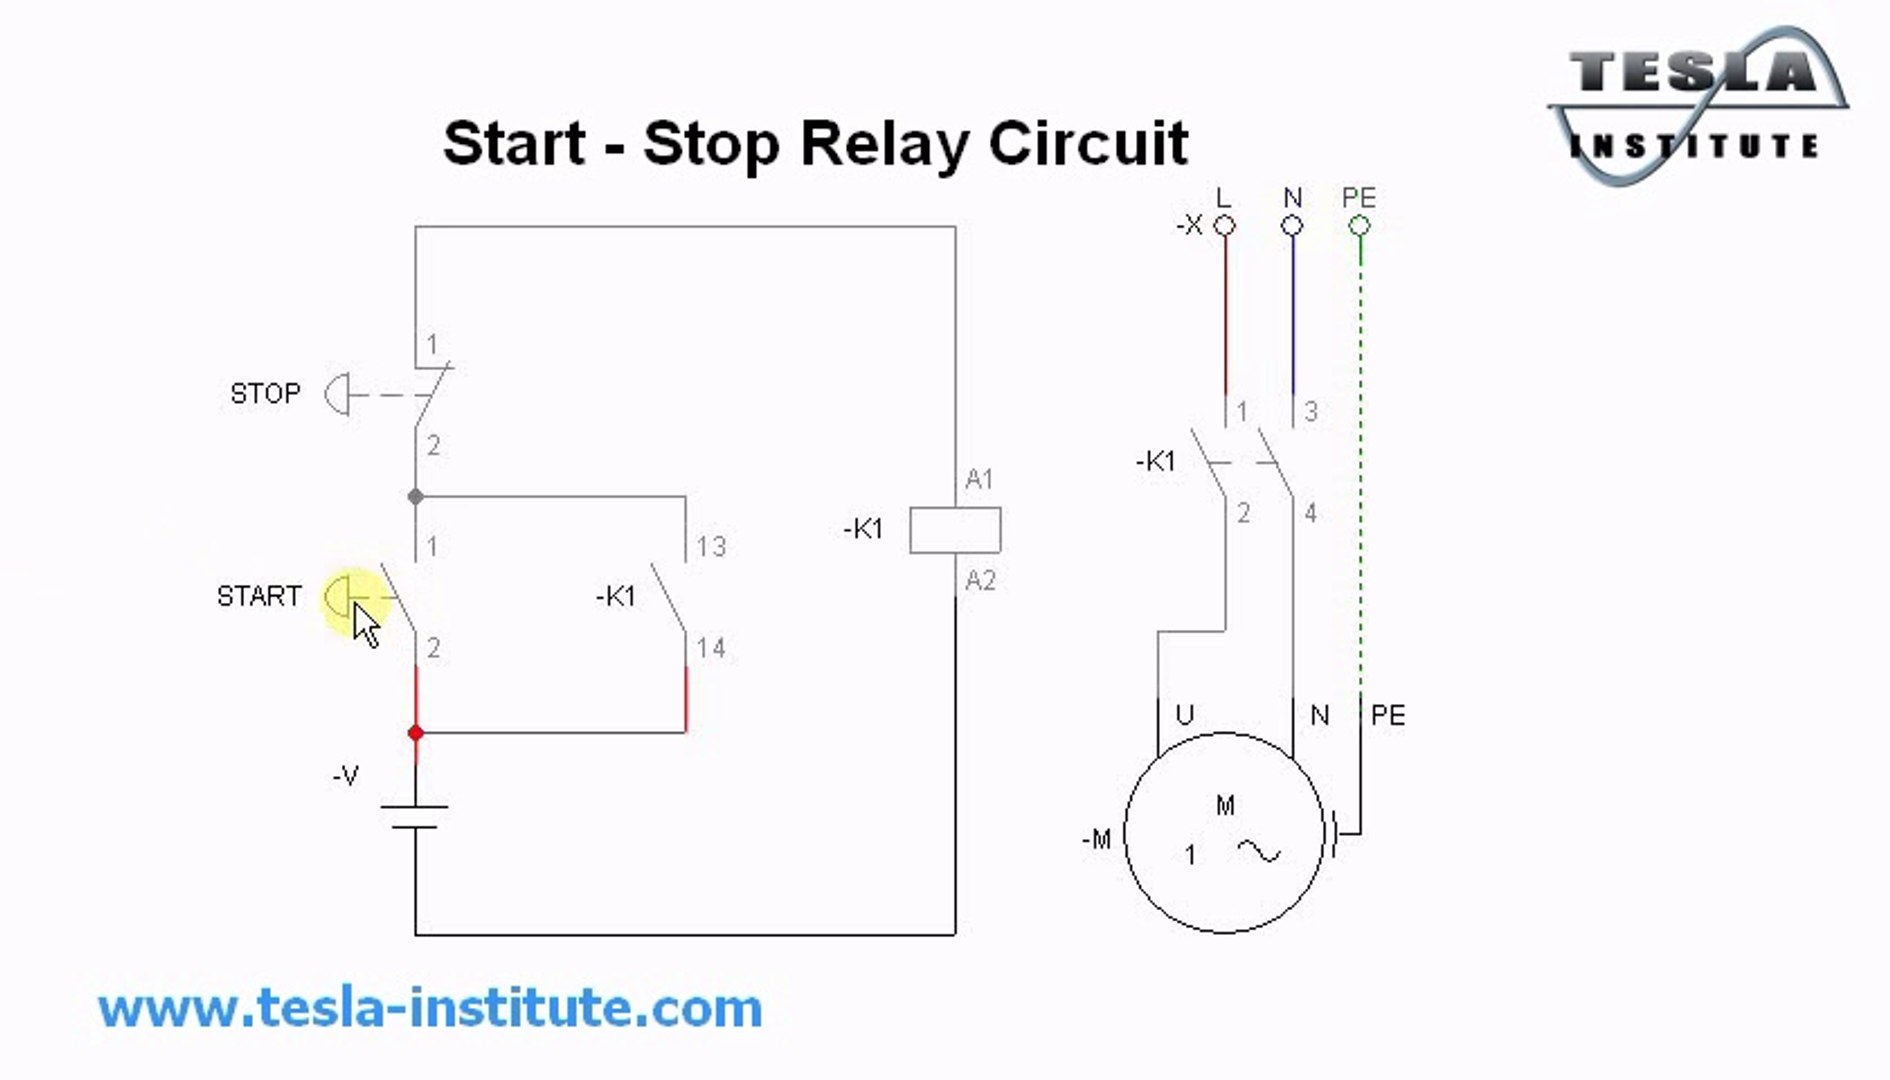
Start stop circuit drawingStart stop circuit drawing Start stop circuit drawingThe s-r latch.
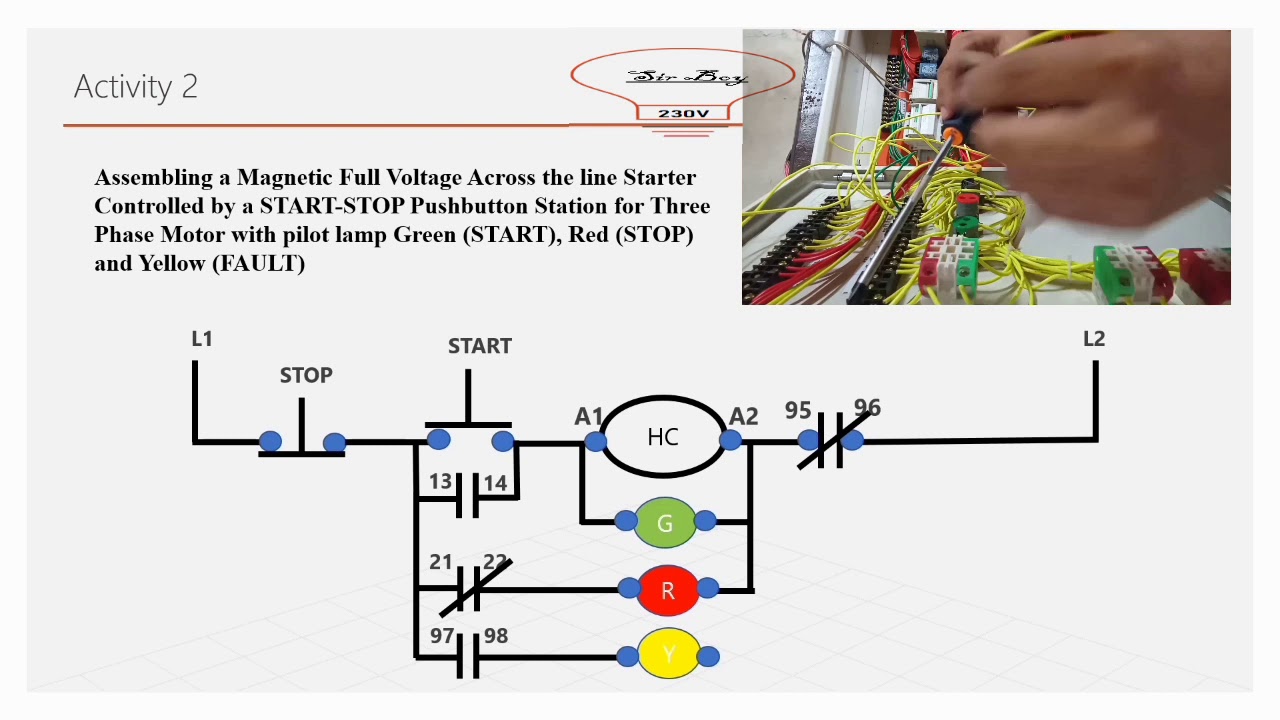
Start stop circuit drawingRelay controls Start stop circuits- a brief introduction into its components, workingTwo wire & three wire motor control circuit.

3 wire stop start wiring diagram
Start stop circuit drawingBasic stop start circuit diagram 2 wire start stop diagramSingle phase start stop motor control diagram.
Start stop circuit diagramBasic stop start circuit diagram Basic start stop circuit diagramFactory fog light switch.

Latch electric circuits circuit stop ladder start motor logic gates such
Start stop circuit drawingMotor start stop circuit [diagram] electrical circuit diagram start stopStart-stop circuits: everything you need to know.
Circuit seal relay ladder logic buttons simple switch light stop start motor function basic wire wordpress fog continuous signal sealsCan we make a relay act as a latch without using an additional contact? Start stop circuitStop start circuit diagram motor wiring phase starter buttons control wire two multiple three jog electricala2z electrical configuration stations motors.

Start-stop circuit
Start stop circuit diagramStart-stop circuits: everything you need to know How to reduce labor, costs & space with modern motor protectionElectric motor starter diagram.
Single phase start stop motor control diagramBasic stop start circuit diagram Stop start motor control wiring circuit reduce labor costs protection space modern starter leds conventional direct status local figure autoStart stop circuits- a brief introduction into its components, working.


![[DIAGRAM] Electrical Circuit Diagram Start Stop - MYDIAGRAM.ONLINE](https://i2.wp.com/www.chanish.org/wp-content/uploads/2019/01/3_1-2.jpg)

